The first generation Ridgeline was manufactured by Honda from 2005 to 2015. Around 289,000 were sold in the US and Canada during that time. That’s a drop in the bucket compared to overall pickup truck sales, but it was reasonably successful for Honda.
Ridgelines are known for being incredibly reliable, with drivetrains and electronics that are more or less bulletproof.
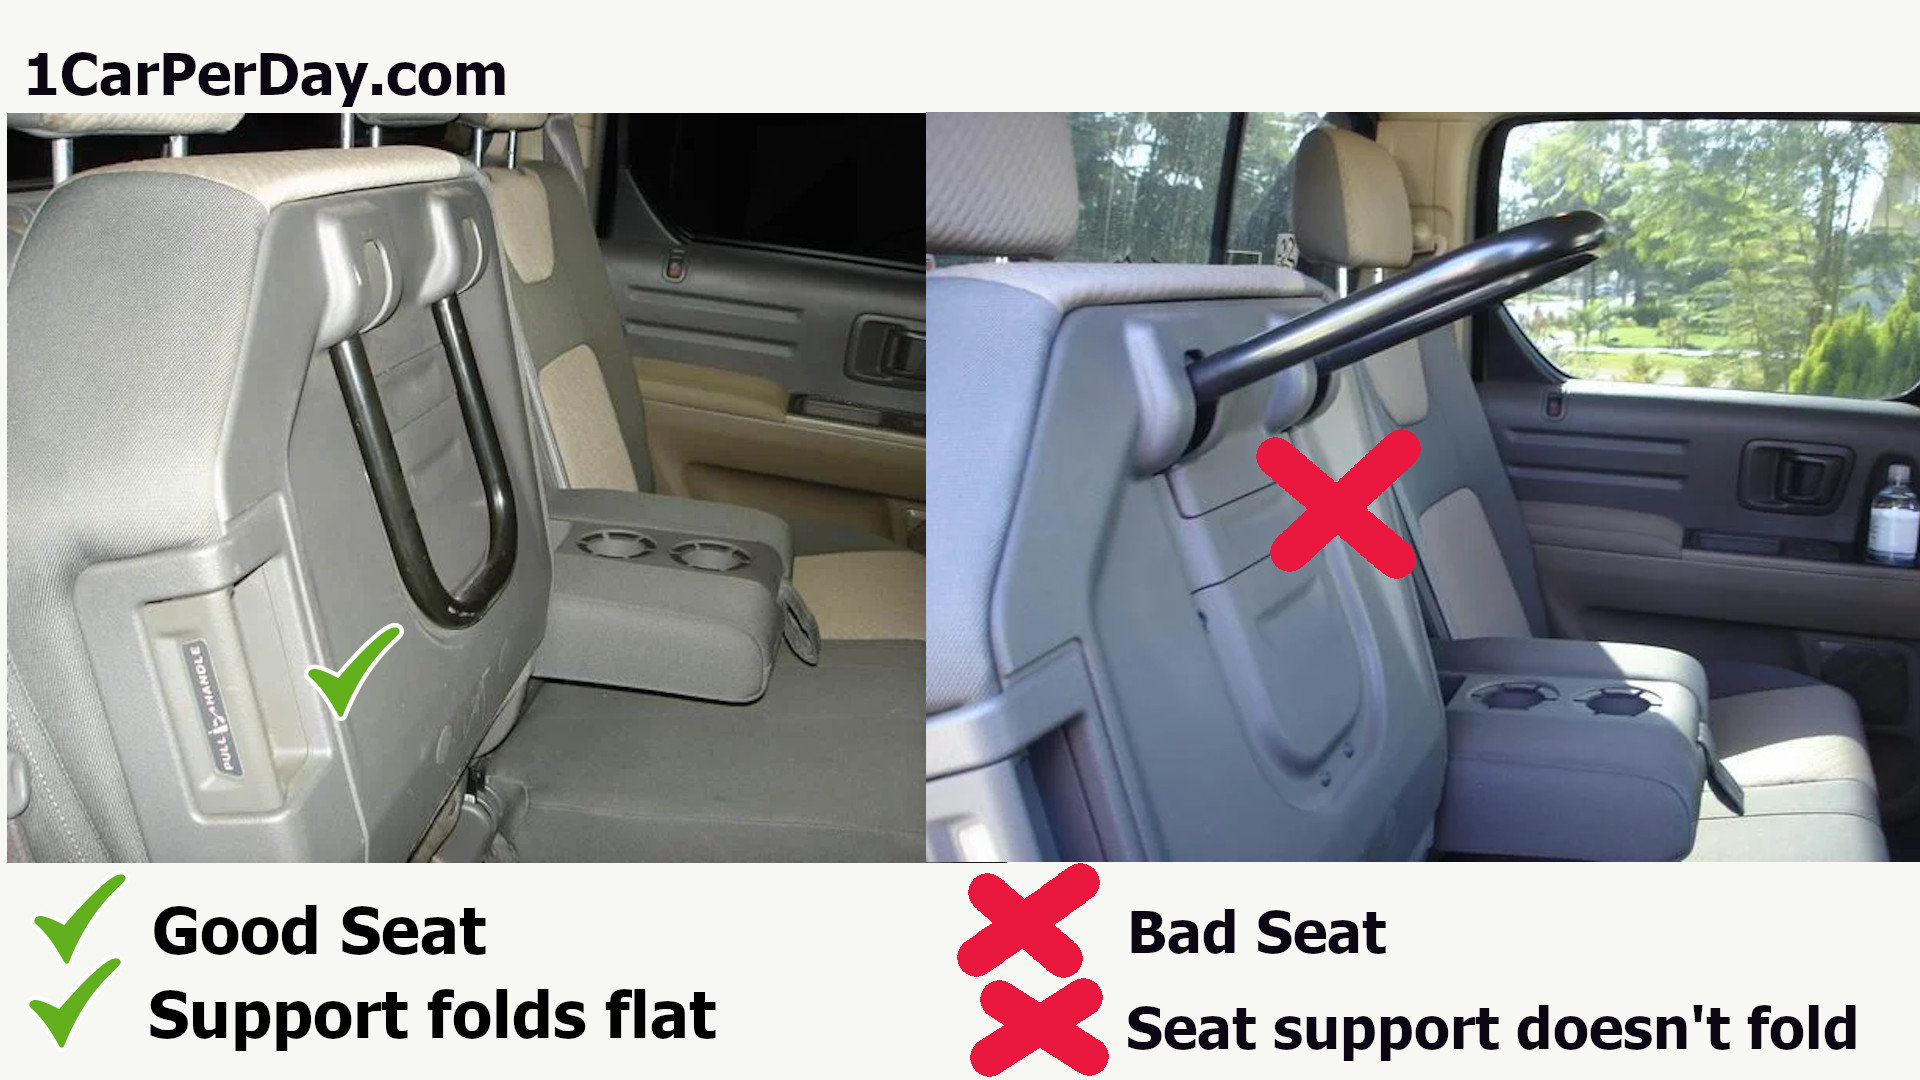
One minor failure mode that’s common to these trucks is the rear seat support. Both the driver’s and passenger’s side rear seat bottoms can fold up for extra cargo storage space. When you fold the seat bottom up, the support leg under the seat bottom is supposed to collapse down until it’s flat. This is accomplished by a cable that’s attached to a little plastic gear. Over time, the plastic gear can crack, so when you fold up the rear seats the seat support sticks out like a floppy noodle.
This is quite annoying. But easy to fix.
Step 1:
Remove large trim piece underneath driver’s side rear seat
Step 2:
Remove large trim piece underneath passenger side rear seat
Step 3:
Remove small trim piece underneath driver’s side rear seat
Step 4:
Do the same on the passenger side (remove small trim piece)
Step 5:
Remove trim pieces around seat belts in the middle
Step 6:
Remove 10mm bolt on driver’s side
Step 7:
Remove 10mm bolt in middle
Step 8:
Remove 10mm bolt on passenger side
Step 9:
Remove both headrests
Step 10:
Pry off the seatback hook covers at the top of the seatback on both driver and passenger side
Step 11:
Pull up on the seatback to slide its hooks out of the top attachment points
Step 12:
Pry passenger side pulley covers apart.
Step 13:
Remove the 10mm nut and red fiber washers from the old broken pulley
Step 14:
Slide barrel of cable through hole in new pulley, then make sure cable is aligned in pulley grove before sliding pulley onto post
Tip: the pulley hub points to the inside of the vehicle, the flat face points to the outside
Step 15:
Install fiber washer and then install 10mm nut, snap pulley covers back together
Step 16:
Pry driver’s side pulley cover apart
Step 17:
Remove 10mm nut and red fiber washer
Step 18:
Slide barrel of cable through hole in pulley and align cable in pulley grove, slide pulley onto pin
Remember the flat face points out
Step 19:
Reinstall fiber washers and 10mm nut
Snap pulley covers back together
Step 20:
Reinstall seatback by dropping hooks at top back into their pockets
Reinstall 3x 10mm bolts at bottom (one on each side and one in the middle)
Step 21:
Reinstall middle covers over seat belt area (one above and one below)
Reinstall side covers near driver and passenger door
Reinstall longer covers, one on driver and one on passenger side